mantle.nes breakdown blog part 2
sprites, monsters, and janky hitboxes
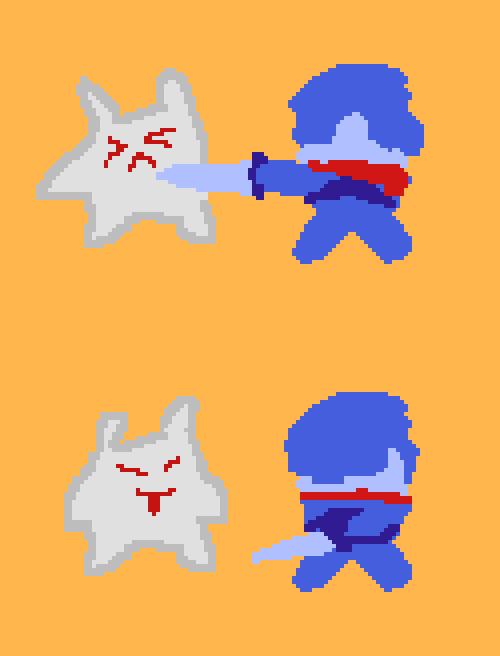
Welcome back to my little series, talking about how I built my Deltarune Ch3 NES demake/fangame!
Last time on the blog, I talked about how I got the project started, and some of the technical details on background tiles and level editing. In this part, I’m going to go over the player’s sprites & behaviours, monsters, hitboxes, the HUD, text, and cutscenes!
Sprites
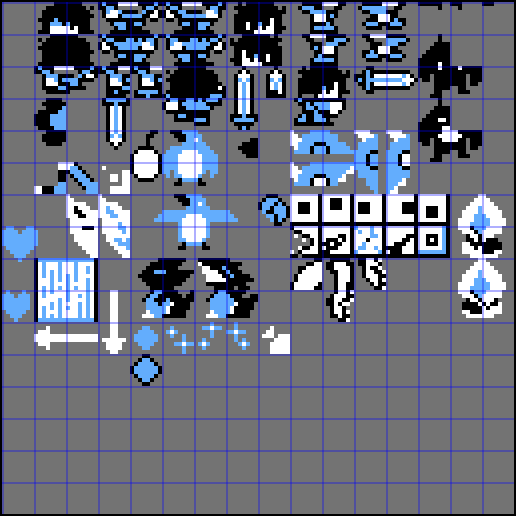
Sprites are how the NES renders moving objects. Each sprite is made up of 8x8 tiles, just like the backgrounds, but they can be individually placed anywhere on the screen. Sprites overall can use a different set of sixteen colors from the background, with each individual sprite being able to pick one four-colour palette where the first colour is a shared transparent colour. This means that effectively, each 8x8 sprite may use three colours.
Just like with the background tiles, we can group multiple 8x8 sprites together to render a larger single sprite on the screen. This is extremely common in NES games, and as such, larger sprites like this have a name: “metasprites”!

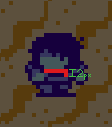
But hold on a minute - what’s this? This suspiciously Kris-shaped sprite actually has four colors in it. Well, anyone familiar with NES game development or technicalities already knows this and is yelling something like, “that’s just the Megaman Face Trick!!” at the screen. And they’re right! What I’ve done here is actually draw another sprite, the scarf, on top of the four sprites that make up the player’s metasprite, using five overall.
Now, this can be a little risky, since the NES’s PPU is only capable of displaying eight sprites per horizontal scanline. But given that the scarf is only two scanlines tall, it’s unlikely to cause much of a problem. Well, that’s what I thought, anyway - a little bit of foreshadowing here…
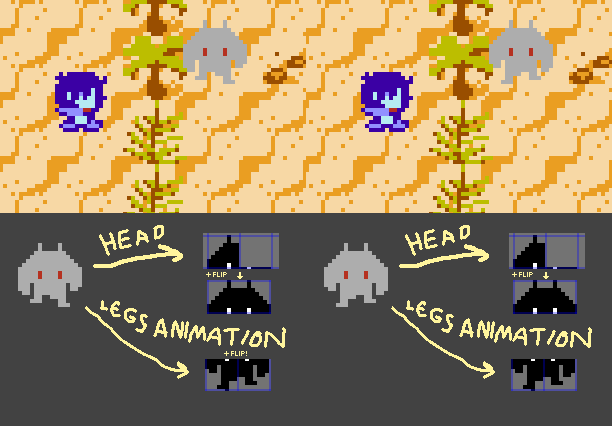
The graphical data for each sprite was added to the CHR ROM in pretty much the same way as the background tile data, but my process for assembling the sprites was a lot less elegant. I didn’t use any kind of tool to stitch the sprites together; instead, for each frame of animation, I just sat down and hand-wrote each metasprite, one by one. Which took forever. I really don’t have anything clever to say about this, I just hammered away at the keys any time I needed a new sprite instead of spending maybe half a day on making a little tool. Good job, me! Real gamedev hours right there. Here’s what that data looks like; each line specifies the X offset, Y offset, tile index, and palette-and-flip state of the tile.
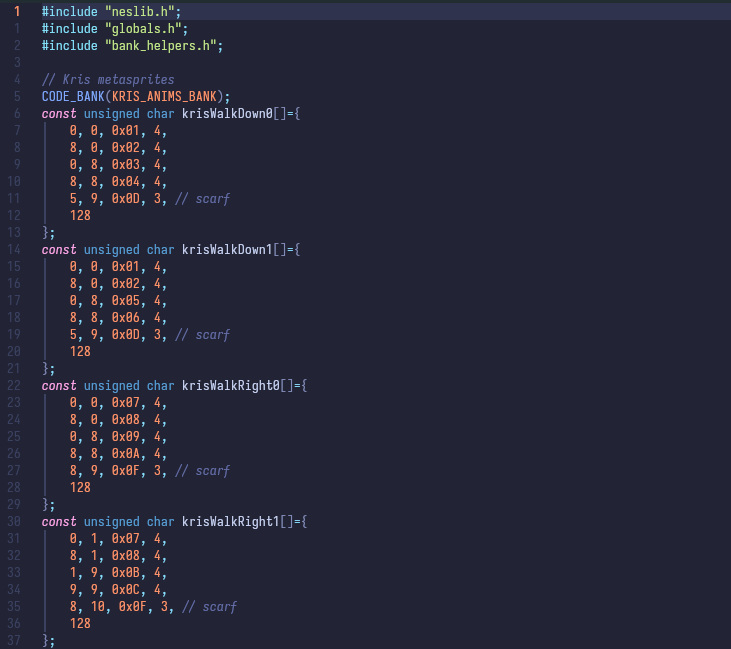
What is the “flip state”? Unlike background tiles, the NES’ PPU can flip sprite tiles along their horizontal and vertical axes, so for many of the monsters, and some of the player’s animations, I only needed to draw half their sprites and use the flip state in order to draw the rest of the metasprite. Handy!
Monsters
Having graphics is one thing, but it’s quite another to write the behaviour for the player and the monsters. Starting with the monsters, I decided to use a shared data structure for every kind of monster. I could have written a unique data structure for each type, but I’d be repeating a lot of information, which would bulk up the size of the code.
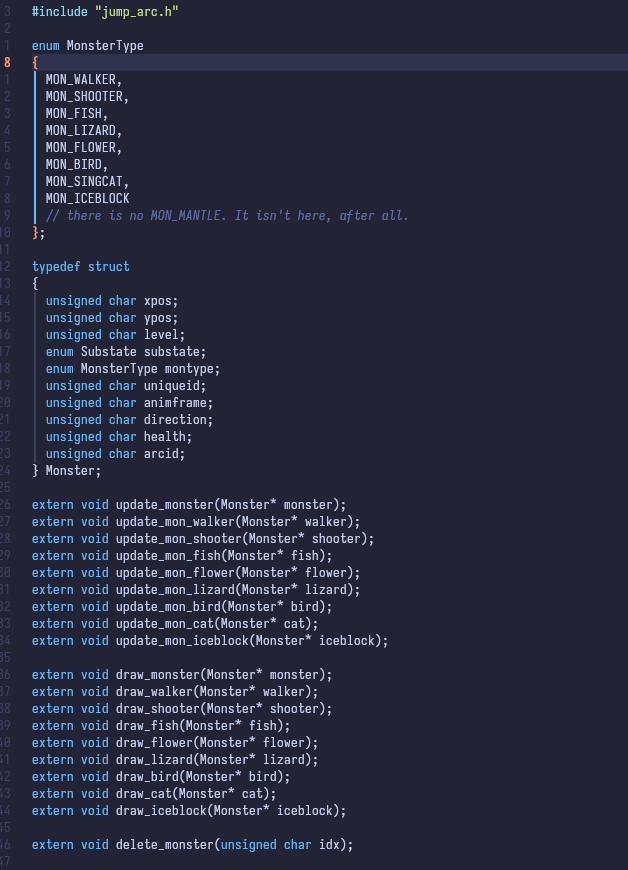
The structure contains their X and Y screen position, HP, a “monster type” variable, and their current state. For example, I have a “S_NORMAL” state for ordinary walking-around behaviours, “S_HURT” when damaged by the player and flashing, “S_WINDUP” when preparing an attack or jump, and so on. They also have a few other fields, including their unique ID from the map file, which I mentioned in the previous blog post.
When I want to update a monster’s state, I just run a different function or subroutine depending on the type variable of the monster. For example, this “Shooter” type monster actually also runs the “Walker” monster’s update code, since they are otherwise very similar. This system also applies to drawing each monster, which means if the type variable of a monster changes during gameplay, it instantly becomes that new monster type. This is very convenient for turning monsters into movable ice blocks - ice blocks in the Ice Palace section of the game are actually just another type of monster!
A statically-sized array of these monster structures sits after the zero-page in RAM, but the actual number of currently living monsters is kept in the zero-page. This makes it very quick to check if any monsters are still alive, and if none are, then the game skips the monster-logic part of the update loop entirely to save processor cycles and avoid accessing that part of RAM.
Also, you might have noticed the include "jump_arc.h" line at the top of that screenshot. That contains a bunch of pre-calculated smooth jump arc data for the jumps that the lizard monsters do; calculating smooth arcs and angles on the fly on the NES is extremely slow, as its processor (the Ricoh 6502) has no machine-code instructions for basic division, never mind trigonometric functions! So, I wrote a small script that outputs a table of numbers for the sprite to follow, based on a relative jump distance in tiles it wants to make. I’ll go into more details about how this works in a later post; there are a bunch of fun little optimizations like this throughout the project, so I want to give them their own space in the future. One bonus one for you; when I call functions to look up data in these jump arc tables, I don’t pass any parameters into the function. Instead, I have a few globally-defined “general purpose” variables that are used both as inputs to commonly-called functions and outputs from those functions. This might give the programmers in the audience significant pause for thought, but trust me - having fewer stack-allocated variables really does save a lot of time on an 8-bit CPU from 1975! By the by, I even re-use this system for the smooth jump the player makes when they mount and dismount rafts! And talking of the player…
The Player
The player’s data structure is somewhat similar to the monsters, in that it retains information about X and Y positions, amongst other things; the number and kinds of states available are different, and there’s some extra stuff in there for things like moving between rooms, whether they are on a raft right now or not, et cetera. However, I make sure to keep the player’s data structure in the zero-page at all times; that way, it’s very fast to access any values about the player. Since they are always present, and are frequently the subject of the rest of the game’s code, it’s very important that these lookups be as quick as possible.
The player’s HP, EXP, and LV are all kept in the zero-page together, and the LV value is used to determine whether the player should be able to attack with the sword. Picking up the sword item (itself another kind of data structure, shared with the HP-refilling candies) simply increases the player’s LV to 1, allowing them to start attacking.
Time for hitboxes to play their part!
Hitboxes and Collision
There was a lot of feedback about the hitboxes when I released the game. And absolutely, I’ll be the first to tell you - they are janky. They are janky as hell. But why, exactly, is this the case, and why haven’t I done anything about it?
First things first, I need to explain how the player and the monsters collide with map tiles.
Back in the first part of this series, when I was talking about map tiles, I mentioned how they’re made of grouped-together 8x8 tiles to form larger 16x16 ones. Well, when I specify these metatile groupings, I also assign a collision identifier to each one; for floors, bridges, and other walkable tiles, they use value 0. For ordinary walls, trees, rocks, and so on, it’s value 1. And for cacti and spikes, or anything that can hurt the player, I use value 2!
By associating these collision values with the metatiles, I can create a small collision map in RAM when I load the level up. And then when an entity with collision wants to move, I check to see which tile each corner of the entity would overlap after its move. If any of these are solid or spike tiles, the attempted movement is canceled. And for the player, if any of these would overlap something spiky, they get hurt!
This works pretty well most of the time. Since a lot of monsters can be on-screen at once, this is just about the most detailed I can make the collision with the world before it starts to bog down the game’s performance. There are ways for me to improve the performance here, but it would likely involve a lengthy rewrite of how I structure the data.
So.
What is the deal with the sword’s hitbox?!
It’s a twofold problem. First, I made it so that monsters are only vulnerable in their NORMAL, JUMPING, and WINDUP states; once a monster is actively attacking, they don’t take damage. This doesn’t really cause an issue for most players, as they’ll typically focus on avoiding the attack instead of aggressing, but it does mean it’s possible to swing the sword at monsters and just not hit them if they’re currently doing this. There’s no technical reason that the game is like this, I just wrote my first pass of the logic like that and never revisited it.
The second and much more common reason for missed strikes is that the game only checks the middle of the tip of the sword against the enemy hitboxes. It does perform this check twice during the attack animation, in case the player swings early, but swinging the sword late results in missing the hitbox sometimes. As such, it is easy to accidentally miss monsters when they are very close, and is especially noticeable in the City scene where 8-bit Susie can dodge your swings like a pro.
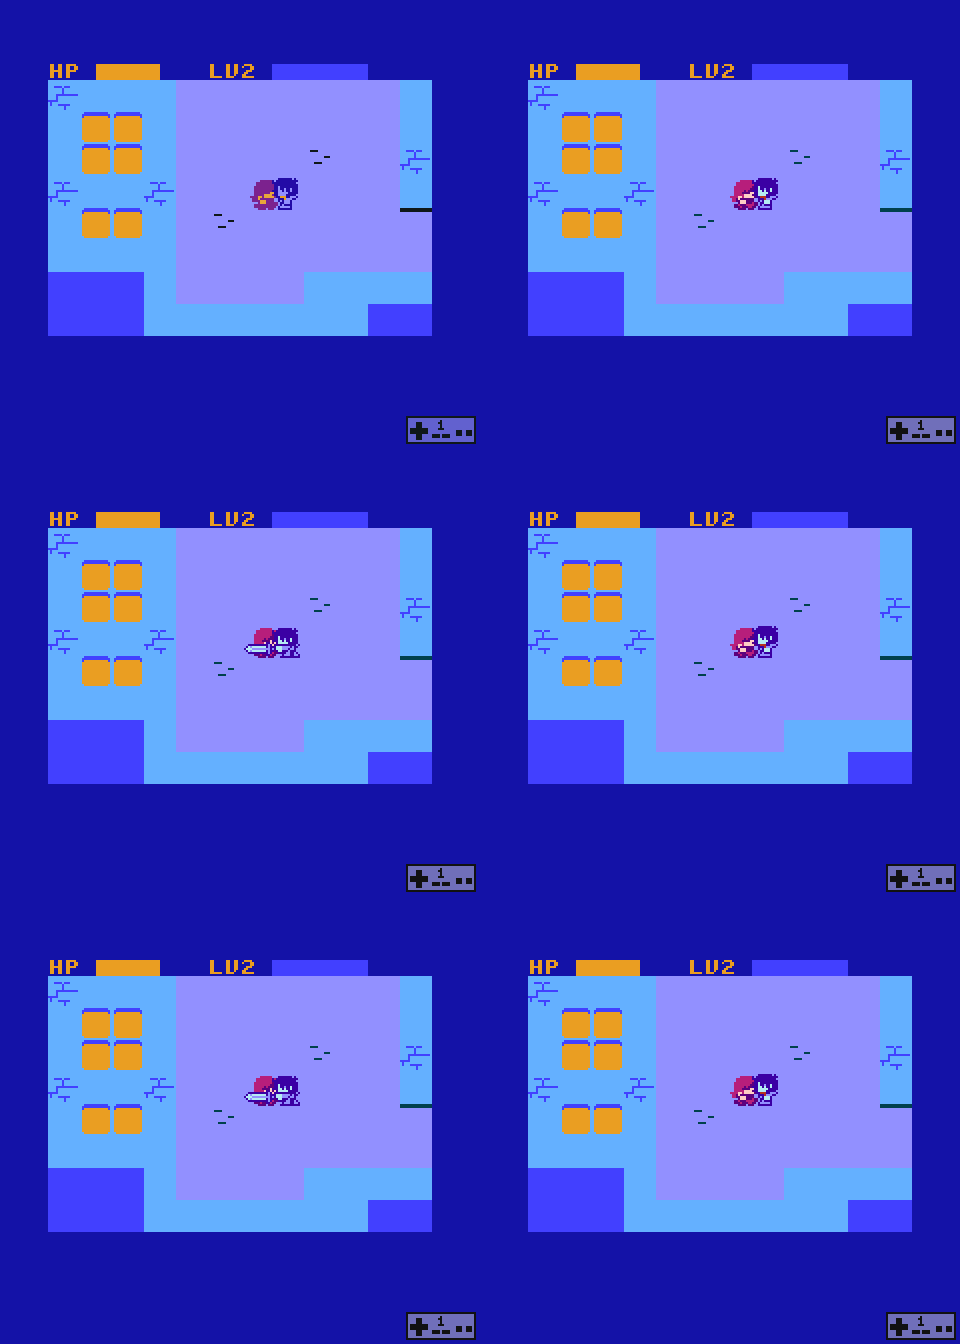
Again, there’s no technical reason or underpinning for this; it’s absolutely trivial to change the sword checking function to check a couple more points along the blade. But, while I did have it on my list to fix eventually, I was kind of swamped with making the rest of the game work - and I was running out of free time in which to do so. Overall, the enemy logic is simplified compared to the original version in Deltarune, and the enemy counts are also reduced due to sprite limitations (the scarf… the scarf!!!!!), and so I reasoned that even with the jank left in, the game was easy enough to complete. I think I definitely should have tweaked it for the City scene though… sorry!
Text and Theatrics
Cutscenes and text are a very important part of telling the story in this fangame, as they were in Deltarune itself.
The original game usually displays text overlayed on top of the game world; however, due to the palette and layering limits of the NES, we can’t have the text appear in both the top HUD area and within the game world itself very easily.
But luckily, we have this huge border space around the game that otherwise is unused, so it’s the perfect canvas for text!
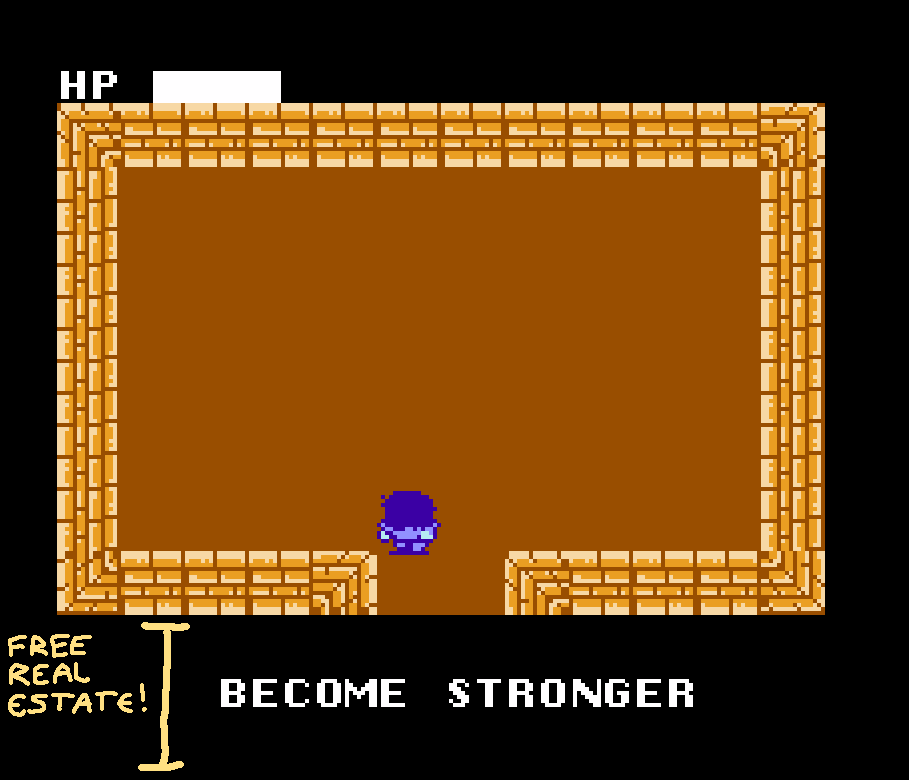
To display text, we need to write to the background layer on the NES. To keep the PPU chip happy, we can only do this during the v-blank period; that is, the time in-between frames, because otherwise the PPU is busy reading from the VRAM. Attempting to write to VRAM from the CPU while the PPU is using it causes the VRAM to become corrupted, so neslib.h provides a very simple system. You give neslib.h a pointer to a buffer; inside the buffer are sort of miniature instructions that you use to tell it which tiles to change and to what, and then neslib.h automatically performs this operation as soon as the NES begins the v-blank period.
The CPU in the NES can be instructed to run specific code when it receives what is called a “non-maskable interrupt” (NMI) from the PPU. This code always runs immediately as soon as the NMI occurs, and so it can be used to guarantee that VRAM writes like this are safe. There’s only enough time to write a certain number of tiles, so I made sure to restrict the number of text lines to two; otherwise, it would take too long to clear the text away and leaves old letters hanging around at the end of the third line.
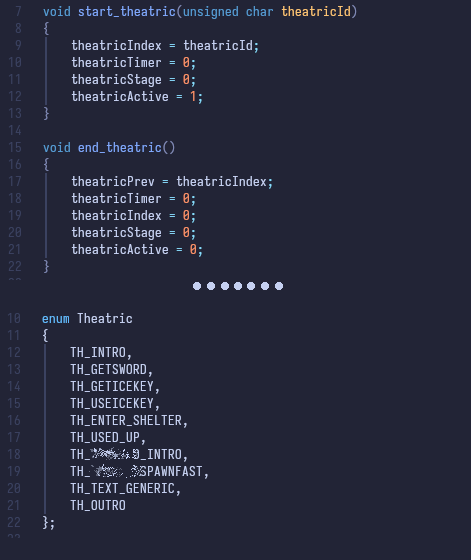
Text is often used during cutscenes in the game; I built a little system I internally called the “theatrics” system. It consists of a flag that says whether or not a theatric is active, a theatric index to determine which scene is playing, and a theatric stage counter and timer, which are used to control the different parts of each cutscene. The values are kept in the zero-page, since they’re frequently accessed.
Pretty much anything that is not normal gameplay is controlled by the theatrics system; for example, this text that appears when you get the ice key, or open the shelter door, or the final boss’ monologues. Even the entire intro sequence uses the system - but more on that in the next part of the blog series!
Next Time

Next time on the blog, I’ll talk about the nitty-gritty of certain optimizations and more details on bank-switching, the music and sound effects systems (and how I had to modify the music driver), the intro cutscene and everything to do with the narrative, including a name reveal of the final boss for anyone who hasn’t yet read the source code, hehe!
Have a great day, all y’all!


